Installing IPFire – a Linux router and firewall
Introduction
There are many ways and solutions to route network traffic between your LAN and the Internet. In this article I will be describing how to install IPFire, a fairly easy to install and configure Linux firewall that also acts as a NAT router.
Read about all IPFire features here: https://www.ipfire.org/features.
For the purpose of this article, I’ll be focusing on installing and basic setup.
| If you’d like to know how to achieve the same goal with a Raspberry Pi, stay tuned as I will soon be writing an article on how to transform your Raspberry Pi into a NAT router. |
Technical considerations
You will need a machine with two network cards, one for the internet side, which will be the “Red” interface and one for the LAN side, which will be the “Green” interface. I’m installing in Hyper-V but it is exactly the same process if you’re installing IPFire on a physical machine.
For further hardware requirements, consult them here.
The only major consideration, in my case, and because I’m installing in a Hyper-V virtual machine, is that the x86_x64 version of IPFire is not yet compatible with Hyper-V (or vice-versa), so I’ll be using the i586 version of it.
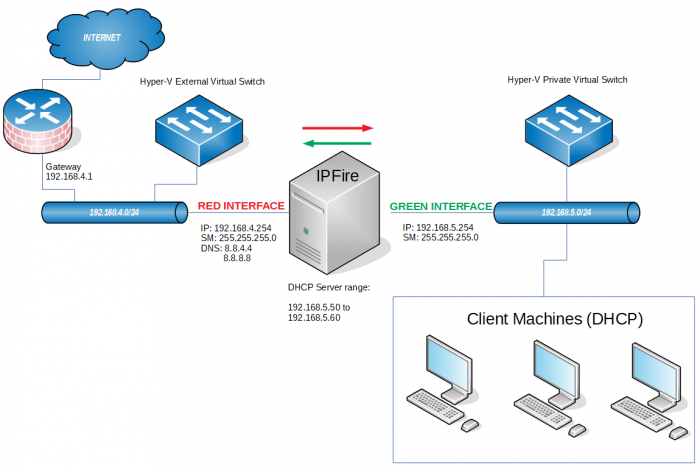
My virtual lab is like this:
So…
Let’s Start!
Downloading IPFire
Download IPFire from https://www.ipfire.org/download. As stated before if you are using Hyper-V you must download the i586 version.
Installing IPFire
| NOTE: Before starting take note of the MAC Address of both your NICs. You’ll need them later. |
Burn the ISO you just downloaded to a CD or USB and boot up your computer with it. There’s a good tutorial on how to burn ISOs to a flash drive here.
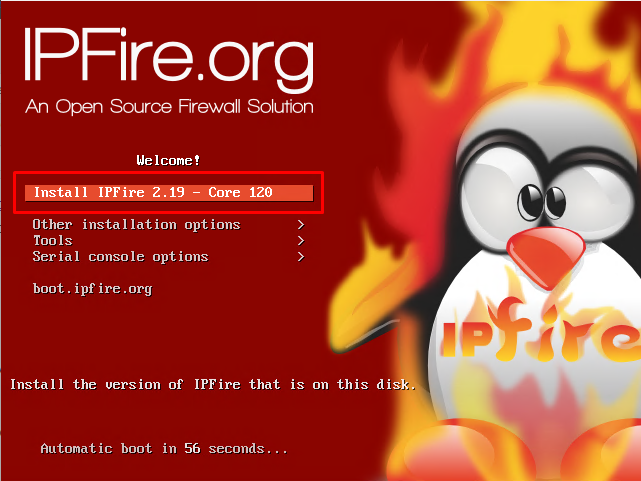
Upon boot select the first option by pressing “Enter”.
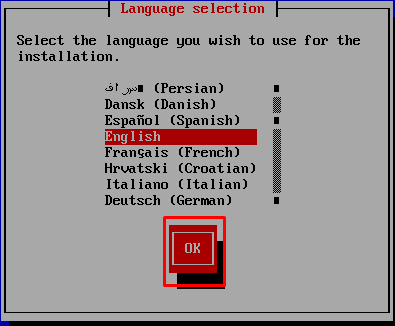
Select the language you wish to use for the installation process and press “OK”
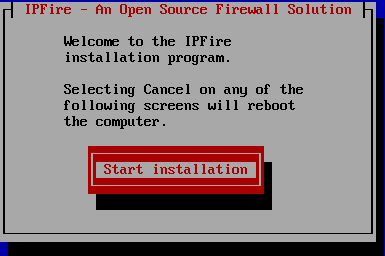
Click on “Start installation” to start the installation process.
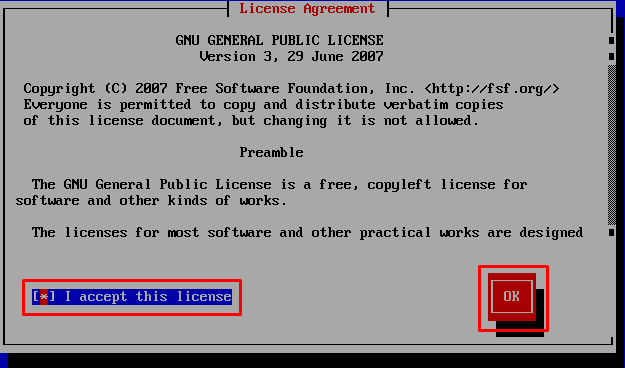
But before you must accept the license agreement. Press “OK”.
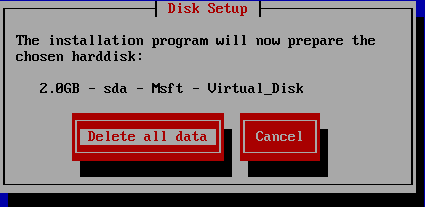
In this next step the IPFire setup will tell you on to which hard drive it will be installing. If you are unsure, the best option is to cancel the setup. In this case, I’m pretty sure that I want to install to the selected hard drive, so I’ll be choosing “Delete all data”.
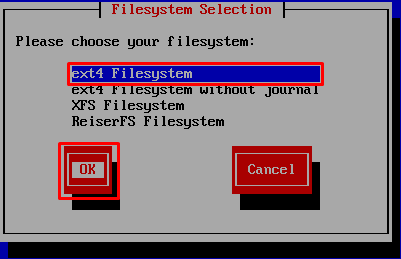
Choose Ext4 as the filesystem and press “OK”.
IPFire setup will now install the system
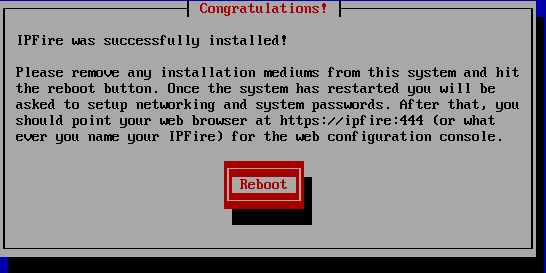
Press “Reboot” to complete the installation process.
Configuring IPFire
Assigning the Interfaces
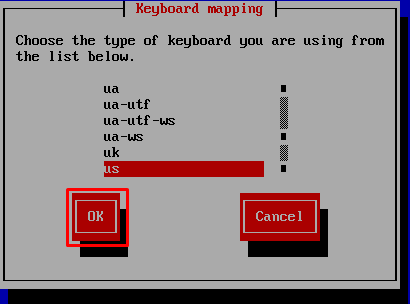
After rebooting it’s time to configure IPFire. The first screen you are presented with is to select your keyboard mapping. Select the one that most fits you and select “OK”. Mine is “us”.
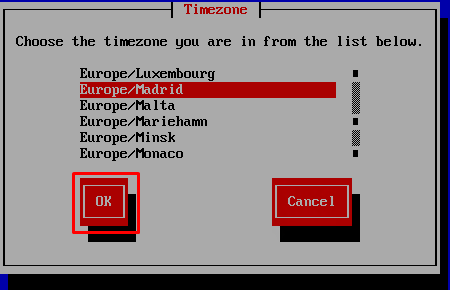
Choose the Timezone and press “OK”.
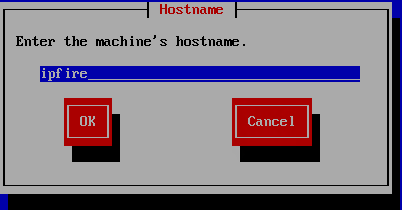
Give your firewall a hostname. I’ll leave the default “ipfire”. Press “OK”.
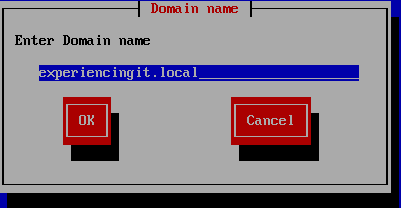
Enter the DNS domain name. You can just leave it as default or choose a new one. Press “OK”.
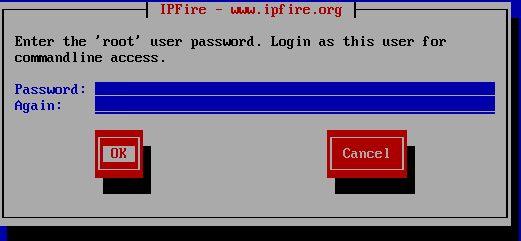
Enter the “root” password for your installation of IPFire. Note that no stars or dots will be shown while you type the password. Press “OK” when finished.
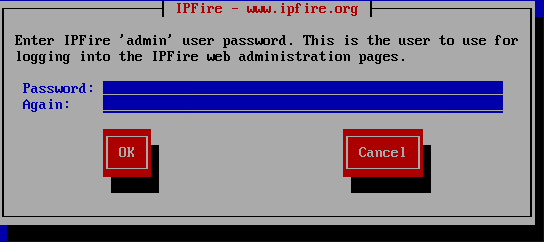
Enter the “admin” password for logging on to the IPFire administration web. Press “OK”.
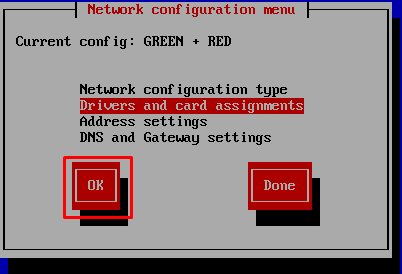
In the next screen you will be presented with the “Network configuration menu”. This is where we’ll configure IPFire’s network cards assignments and IP configurations. The first thing to do is select “Drivers and card assignments” and press “OK”.
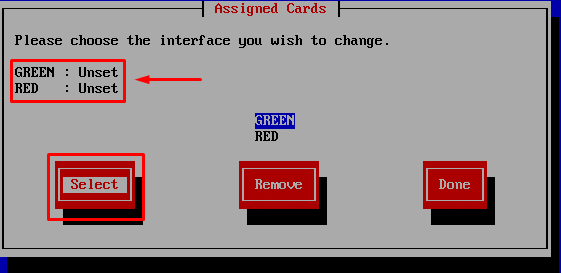
As you can see from the image below both “Green” and “Red” interfaces have no network cards assigned. So, let’s start with the green one by choosing “Green” (should be by default) and then press “Select”.
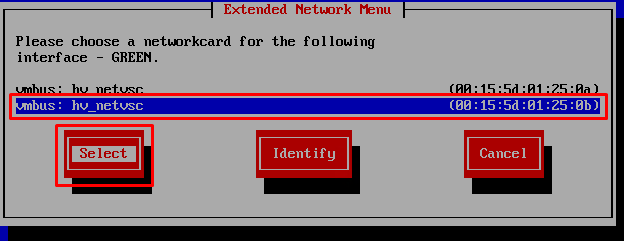
Now, this is the tricky part, for the network card assignment we should know the hardware address of the network card that is connected to the green interface, i.e., the LAN. And the same goes for the red interface.
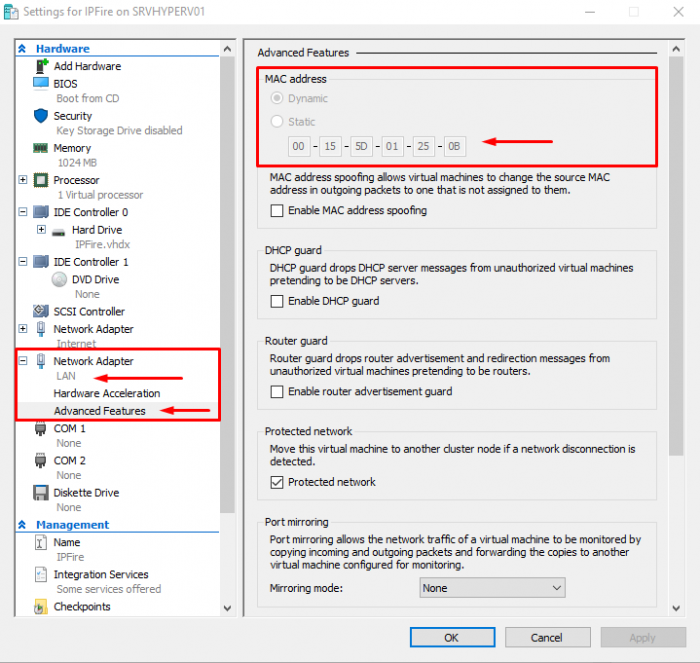
If you are using Hyper-V, as I do, open the virtual machine settings and, under each “Network Adapter” node, under “Advanced Features” you’ll find the NIC’s MAC address.
As you can see from the image below, I was careful enough to identify both network adapters (Internet and LAN). On the right side of the window you’ll find the MAC address, which now is set to “Dynamic”, but it’ll be a good a idea to set it to static after finishing installing.
So, I’ll proceed with the configuration by selecting the NIC for the GREEN interface.
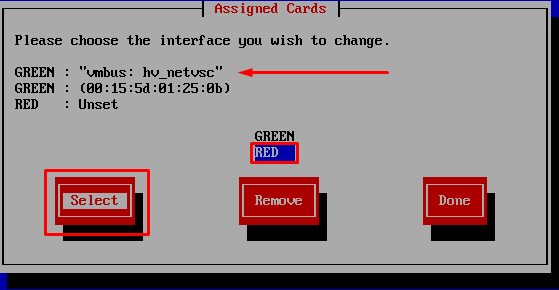
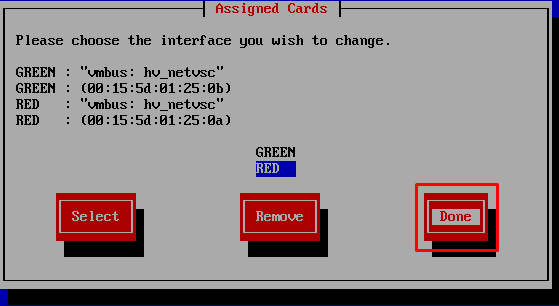
Back to the “Assigned Cards” menu, you’ll see that the interface has been assigned to the GREEN interface. It is time to do the same for the RED interface. Select “RED” and press the “Select” button.
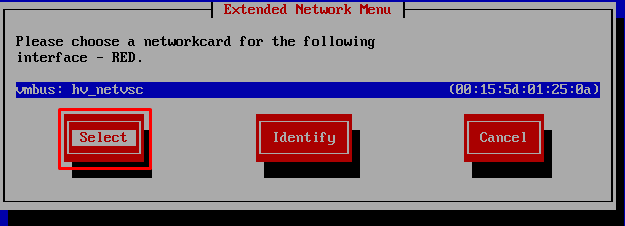
Now, only with one NIC left, it is just to press the “Select” button.
With both interfaces having assigned NICs, press “Done”.
Configuring Network Settings
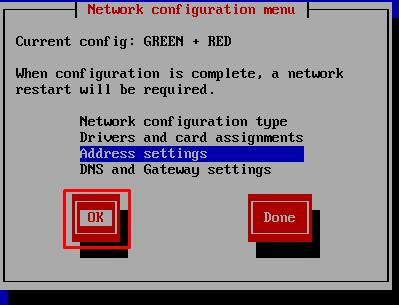
Back to the “Network Configuration Menu”, select “Address Settings” and press “OK”.
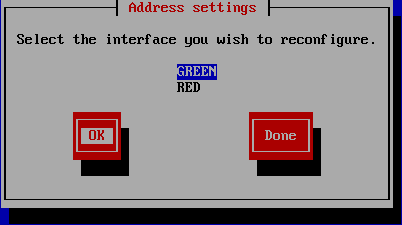
Let’s start with the GREEN interface. Select “GREEN” and press “OK”.
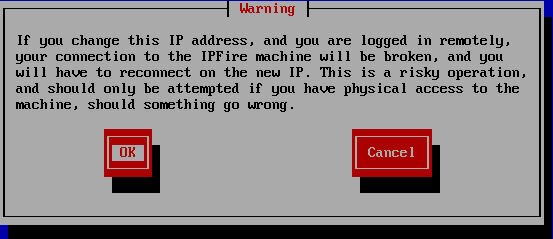
Read the warning and press “OK”.
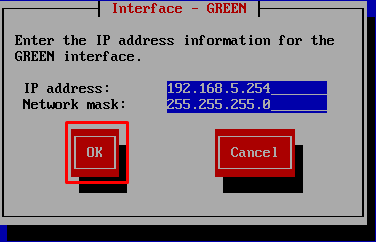
As shown in the diagram in the beginning of the article, I’ll be using the IP address 192.168.5.254 with a netmask of 255.255.255.0 for my LAN gateway. You should configure it according to your network settings. Press “OK”
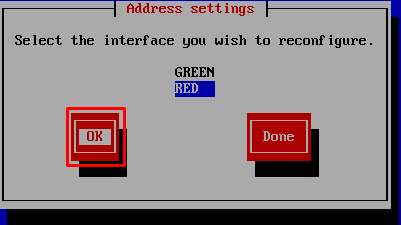
Now, select “RED” and press “OK”.
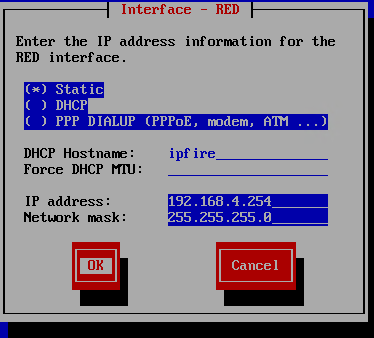
Choose “Static” and configure the IP address for the RED interface. In my case it is 192.168.4.254 with a network mask of 255.255.255.0. Press “OK”
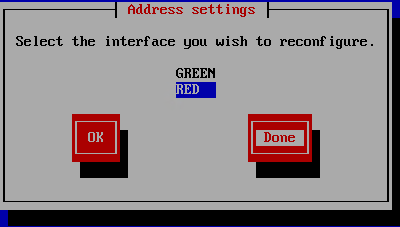
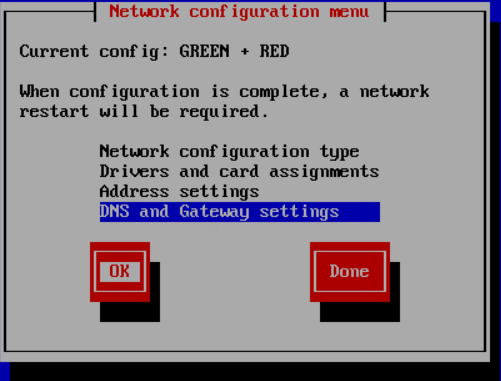
Press “Done” to return to the “Network configuration menu” and select “DNS and Gateway settings” from the menu.
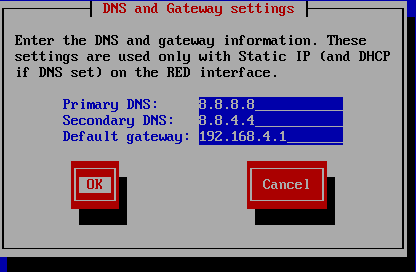
Enter DNS and gateway information. I’m using Google’s DNS servers and the gateway should be the LAN IP of your internet router. Press “OK”.
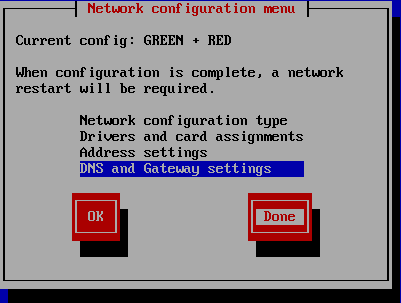
Press “Done”
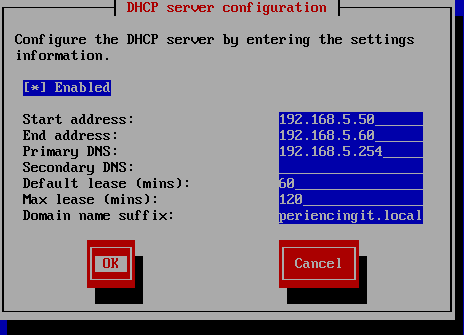
The next step is to configure the DHCP server. The DHCP server will automatically assign IP addresses to your client computers allowing them to access local network resources and the internet. My LAN network configuration is 192.168.5.0/24, so, from this range of 254 addresses I chose a range of ten, from 192.168.5.50 to 192.168.5.60, for the DHCP server to lease to the client machines. You can chose any range you’d like as long as they do not conflict with other IP addresses configured on the network.
If you have no other DNS server in place on your network, set the “Primary DNS” with the IP address of your LAN gateway.
Press “OK”.
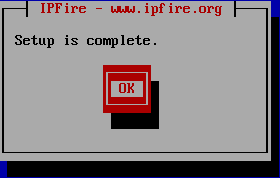
Click on “OK” to complete the setup. The machine will reboot after this step.
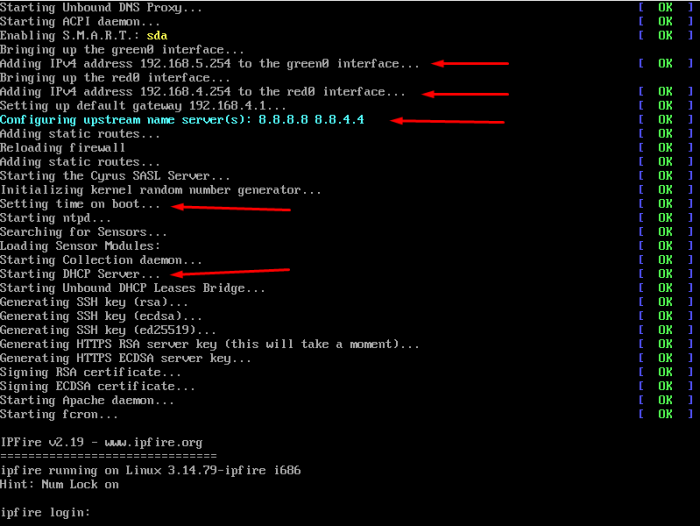
Once IPFire starts booting, you’ll see a series of information, being the most relevant the ones highlighted below.
Testing
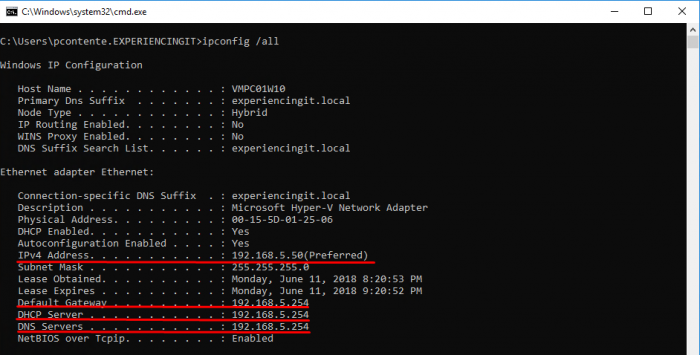
To test that everything is working as it should, connect a client machine to the LAN switch, Running an “ipconfig”, you’ll see that the machine is getting an IP address from the DHCP server (192.168.5.50) and that the gateway, DNS and DHCP servers are set to 192.168.5.254
Open a web browser and type an internet address, like www.experiencingit.net, and it should open fine, meaning you are now navigating through the firewall.
IPFire administration web page
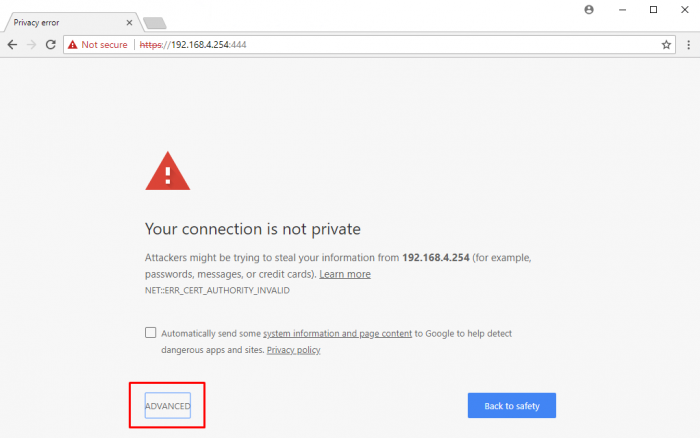
IPFire comes with a very handy administration web page, so that you don’t need to touch the CLI. To open it, from the LAN side, navigate to https://[LAN GATEWAY IP ADDRESS]:444, as shown in the image below. If you get a “Your connection is not private” message, click “ADVANCED”.
And click “Proceed to … (unsafe)”
Enter the admin username and password, which are the ones defined above where written “Enter the “admin” password for logging in to the IPFire administration web”
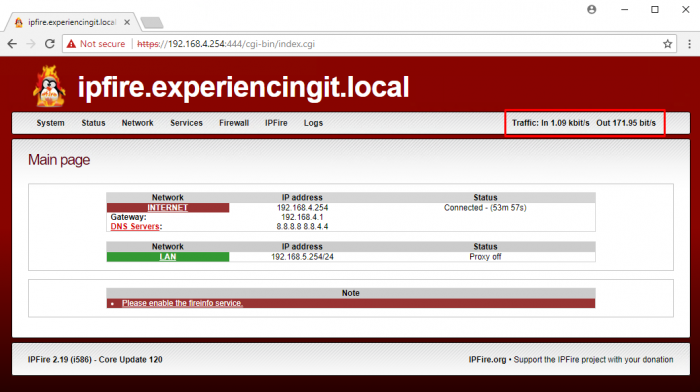
From the landing page of it is possible to see your RED and GREEN interfaces configuration as well a live traffic meter on the top right of the page. Through this page it is possible to configure all aspects of IPFire and unleash its true possibilities, but I’ll leave it up to you!
I hope you enjoyed reading this tutorial!
As always, if you found this article useful, share it with your friends.
If you have any questions or suggestions, please leave your comment.
And… Thank you for reading!








Where do I find the root user password on Linux ipfire on first load up. I’ve rerun the program 8 or 9 times already. Where the hell are the passwords
Hi John!
Thank you for your comment and thank you for reading.
Under the section “Configuring IPFire – Assigning the Interfaces”, there’s a step where the root password is set. This is the one you should use
to login to the console.
Let me know if it helped.
Cheers