SCCM Current Branch – Configuring Boundaries
After having configured the SCCM Discovery Methods, it is now time to configure its Boundaries and Boundary Groups.
As stated in this Technet article, in a nutshell, Boundaries represent network locations on the intranet where Configuration Manager clients are located. Boundary groups are logical groups of boundaries that provide clients access to resources.
So, let’s start with it!
Creating SCCM Boundaries
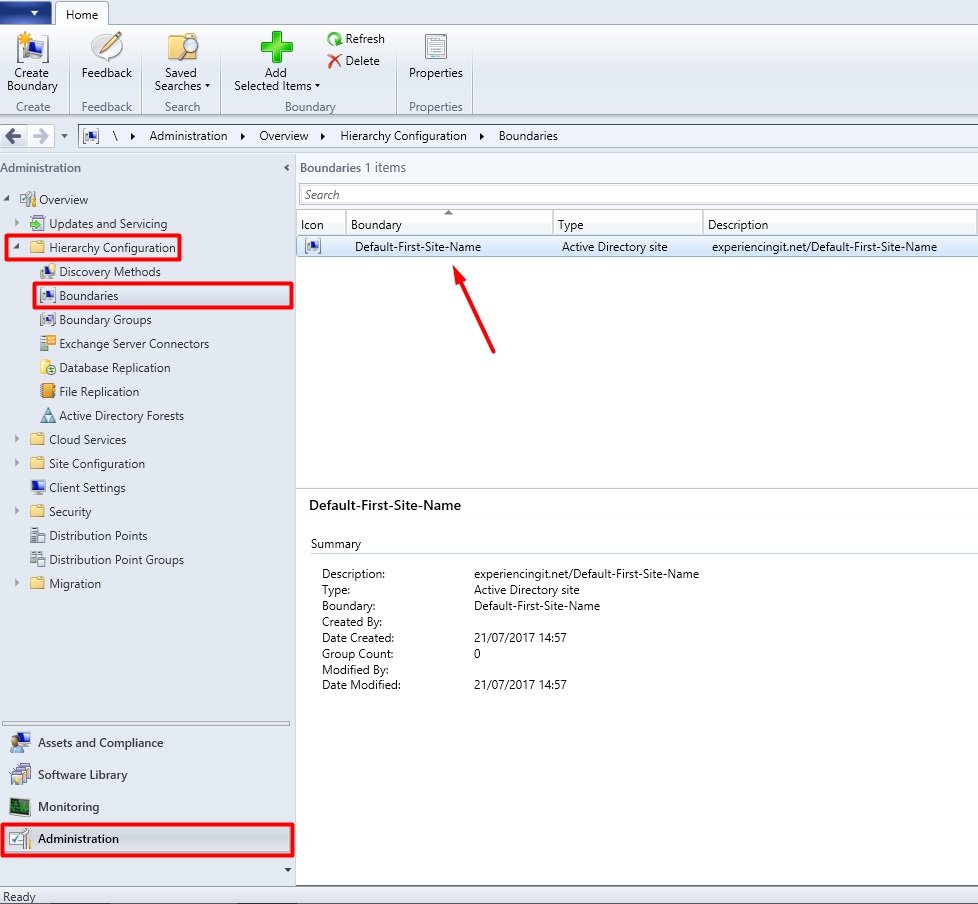
If all went good with the previously configured Discovery Methods, namely the Active Directory Forest Discovery, we should have already a boundary created. Let’s check it.
Open the Configuration Management console, click on “Administration”, expand “Hierarchy Configuration” and then click on “Boundaries”.
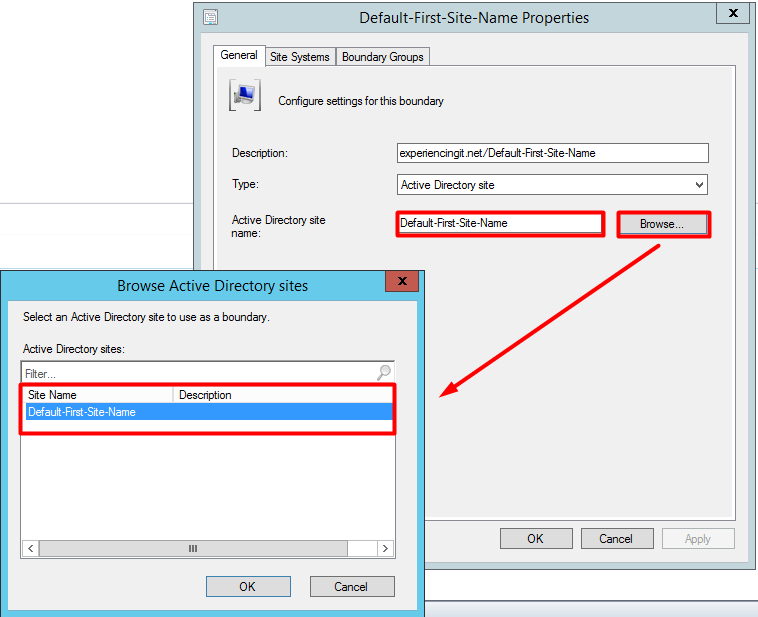
Boundaries are based on Active Directory Site Names. If you right-click the already created boundary and choose “Properties”, in the “General” tab, you’ll see that it is pointing to the “Default-First-Site-Name”, and if you click on the “Browse” button, in the list of available sites, you’ll only see that only one site, which is the “Default-First-Site-Name” site, is available.
If you want to rename the “Default-First-Site-Name” name, you should use the “Active Directory Sites and Services” console. Maybe I’ll write something up on that later on. For the sake of this article I’ll just use the name as it is per default.
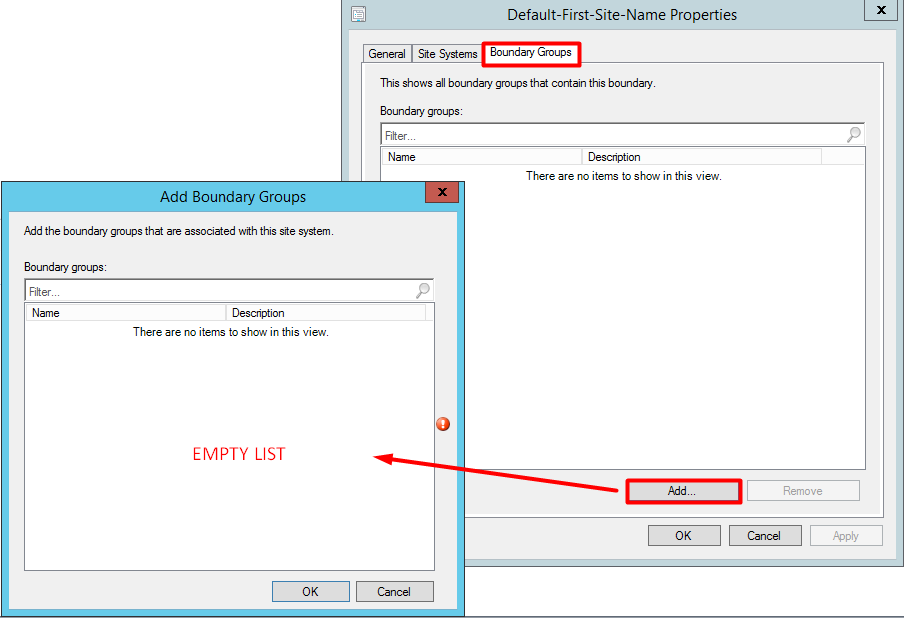
Clicking on the “Boundary Groups” tab, you’ll see that no Boundary Groups are created yet. This should be done, because:
- They enable clients to find a primary site for client assignment (automatic site assignment).
- They can provide clients with a list of available site systems that have content after you associate the distribution point and state migration point site system servers with the boundary group.
- Beginning with System Center 2012 Configuration Manager SP2, they support management points and can provide clients with a list of preferred management points.
Read more about Boundary Groups and planning at the following Microsoft articles:
https://technet.microsoft.com/en-us/library/gg712679.aspx
https://docs.microsoft.com/en-us/sccm/core/servers/deploy/configure/boundary-groups
Close all windows and let’s create the first boundary group!
Creating SCCM Boundary Groups
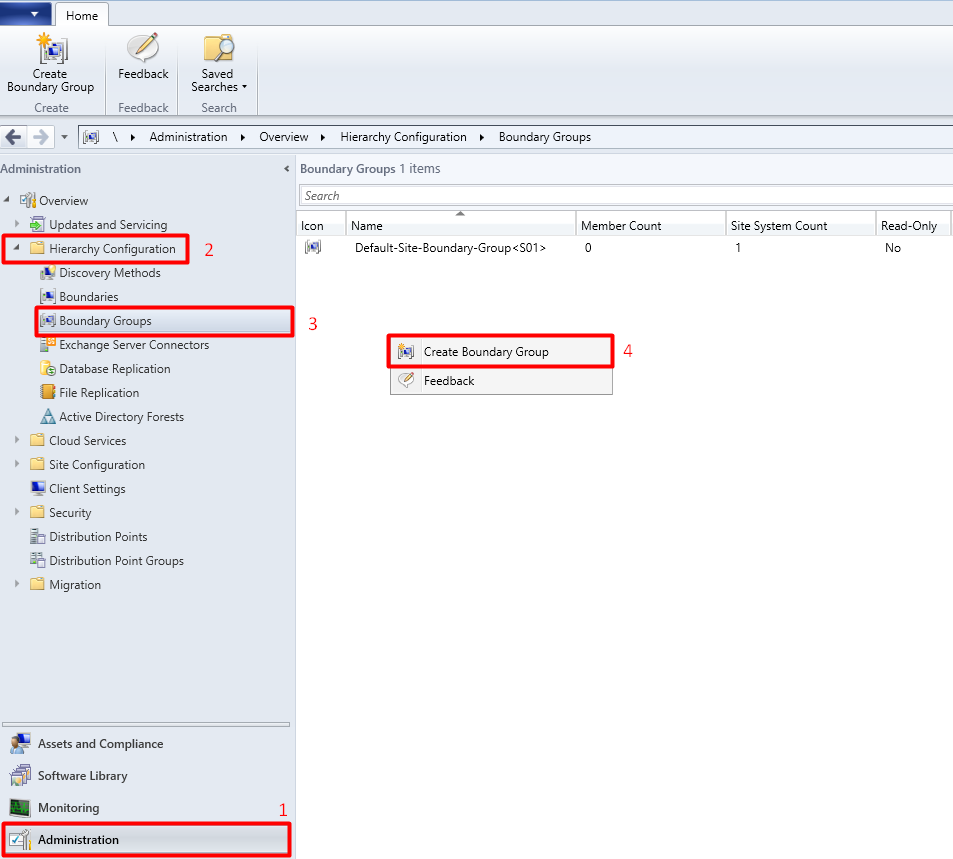
In the System Center Configuration Manager console, click on “Administration”, expand “Hierarchy Configuration” and click on “Boundary Groups”. Right-click on the blank space and choose “Create Boundary Group”.
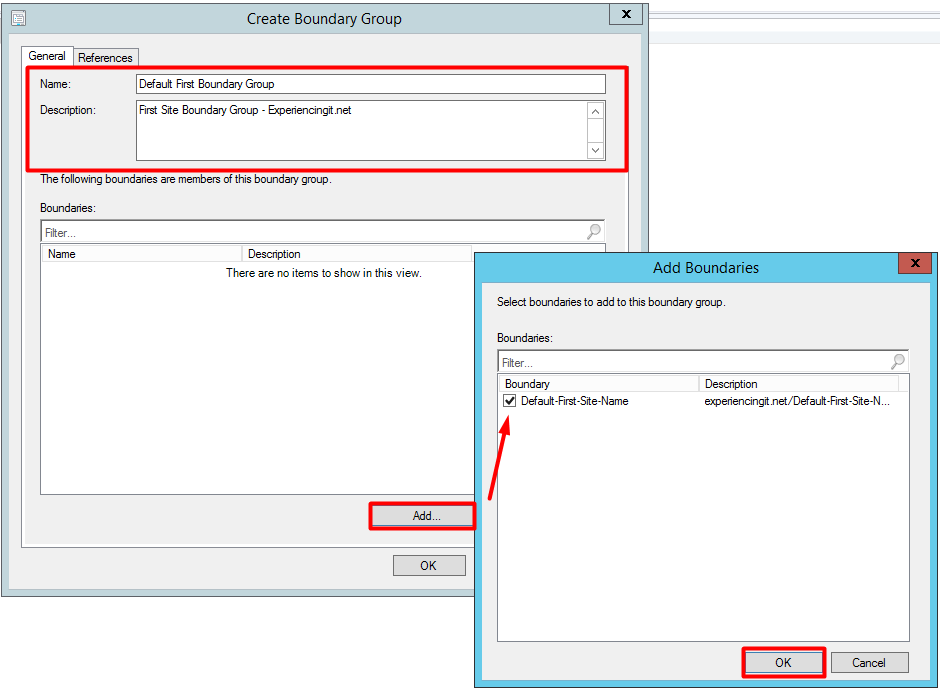
In the “General” tab, give the boundary group a name and a short description.
Press the “Add…” button. Select the “Default-First-Site-Name” site and press “OK”.
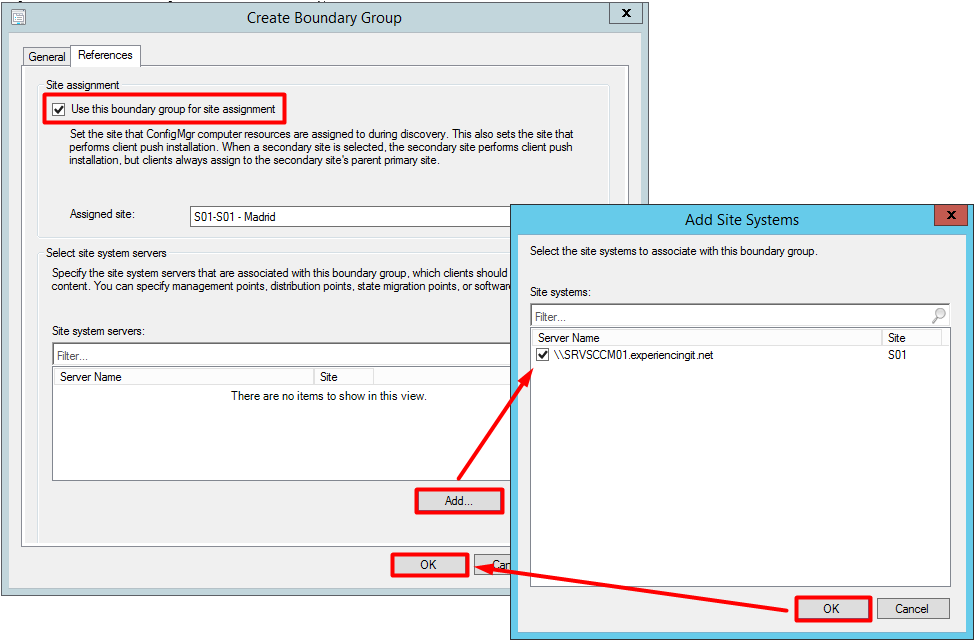
Click on the “References” tab. Check the box for “Use this boundary group for site assignment” and press the “Add…” button. Select the site server and press “OK”.
Press “OK” again at the “Create Boundary Group” properties window.
Looking back at the properties of the “Default-First-Site-Name” boundary, we can see, in the Boundary Groups” tab, that the newly created boundary group is now showing in the list.
This concludes boundaries and boundary groups configuration and, this article!
Again, if you found this article useful, share it with your friends.
If you have any questions or suggestions, leave your comment.
Thank you for reading!




Pingback:SCCM Current Branch Installation Guides & More - ExperiencingIT